

Jewelry-making has always fascinated me — not just because of how beautiful the end results can be, but because it’s such a satisfying and creative process. When I first decided to try making my own pieces, I was surprised by how straightforward it actually was. I didn’t need a professional workshop or expensive materials — just some basic tools, patience, and a clear vision of what I wanted to create. Over time, I learned that handmade jewelry isn’t just about style; it’s a personal expression of creativity and care.
In this blog, I’ll walk you through the simple steps I use to make stunning jewelry at home, no matter your experience level. Whether you want to create something meaningful for yourself or a thoughtful gift for someone else, this process can be both relaxing and rewarding.
Getting Started with the Basics
When I first began, I started small — a few beads, some wire, and a set of pliers. Before investing in tools or materials, I took time to understand the types of jewelry I wanted to make. Earrings, bracelets, necklaces, and rings all require slightly different techniques and supplies.
Here’s what I typically keep in my starter kit:
-
Pliers set: Round-nose, chain-nose, and flat-nose pliers are essential.
-
Wire cutters: Perfect for trimming metal wire to the right length.
-
Jewelry wire or elastic cord: Depending on whether I want flexibility or strength.
-
Beads and charms: Available in a wide range of materials, from glass to semi-precious stones.
-
Clasps and hooks: Used for finishing necklaces or bracelets neatly.
Once I organized everything, I cleared a small workspace at home. A well-lit table and a little storage box for beads made a huge difference. Having a dedicated space not only kept me organized but also helped me get into a creative rhythm whenever I sat down to make something.
Designing Before Crafting
Before picking up my tools, I always sketch a quick idea of what I want to make. It doesn’t have to be a perfect drawing; even a simple layout helps visualize how the final piece might look. For me, design planning saves time and reduces mistakes later.
When designing, I focus on three things:
-
Balance: Keeping the symmetry or intentional asymmetry of the piece.
-
Color combinations: Matching tones that blend or contrast beautifully.
-
Purpose: Whether it’s for everyday wear or a special occasion.
Sometimes, I get inspiration from nature, fashion, or even the mood of a particular day. I remember once working on a piece while taking a short break with Custard Monster’s, which somehow sparked an idea for a soft gold and cream-toned necklace that became one of my favorites. Inspiration really can come from anywhere — even from small, relaxing moments like that.
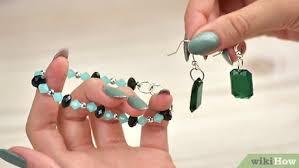
Step-by-Step Jewelry Making Process
After designing, the real fun begins — bringing the piece to life. I like breaking down the process into manageable steps, especially when trying a new technique.
Here’s a simplified version of how I usually create a basic bracelet or necklace:
-
Measure and Cut: I start by measuring the length of the cord or wire according to the design. A little extra length helps with finishing later.
-
Arrange the Beads: I lay out all the beads and charms on a flat surface in the pattern I want. This helps me visualize the final look before threading.
-
Threading: Using a needle or by hand, I thread each bead carefully. If I’m working with wire, I use pliers to secure the ends tightly.
-
Adding Clasps: Once the beads are in place, I attach the clasps using jump rings or crimps. This keeps the piece secure and wearable.
-
Finishing Touches: I inspect the jewelry to ensure everything is tight and smooth — no sharp ends or loose parts.
The process itself feels meditative. Each step brings a sense of progress and control, and watching a simple concept turn into something wearable is incredibly rewarding.
Sometimes, I experiment with materials — mixing metals with fabric, or combining wooden beads with glass ones. The possibilities are endless, and that’s what keeps me coming back to this craft.
Adding Personal Touches
Handmade jewelry becomes truly special when it reflects personality. I love adding small details that make each piece one-of-a-kind. Personalized charms, initials, or even tiny stones with meaning can turn simple designs into memorable keepsakes.
Here are a few ways I add character to my creations:
-
Use birthstones: They make great personalized gifts.
-
Add engraving tags: A simple message or symbol makes the piece unique.
-
Incorporate nature-inspired elements: Feathers, leaves, or shells add organic texture.
-
Experiment with color themes: A monochrome look or a vibrant mix both have charm.
Jewelry-making also encourages me to slow down and appreciate detail. I find joy in small things — matching the perfect clasp, adjusting wire loops, or aligning beads precisely. These finishing steps turn a hobby into a meaningful creative outlet.
Sometimes, when I’m in a calm creative zone, I enjoy pairing the experience with moments of flavor and focus — like when I was trying a new pattern while relaxing with Custard Monster E-Liquid, which surprisingly helped me stay centered and steady throughout the crafting session. Small moments like these make the process feel even more enjoyable.
Tips to Maintain and Gift Handmade Jewelry
Once the jewelry is done, taking care of it properly ensures it lasts long and continues to look great. I’ve learned a few simple maintenance habits that really make a difference.
-
Store carefully: I keep each piece in a soft pouch or jewelry box to avoid scratches.
-
Avoid moisture: Water or humidity can dull metals and loosen adhesive bonds.
-
Clean gently: Using a soft cloth to wipe jewelry keeps it shining.
-
Handle with care: Putting on jewelry after makeup or perfume helps preserve its finish.
When gifting handmade jewelry, I like to package it thoughtfully. A simple box with a ribbon or a handwritten note adds a personal touch. Handmade gifts always carry a story — the time, effort, and emotion behind their creation. That’s what makes them timeless.
I’ve also realized that the process itself is a form of mindfulness. Sitting quietly, focusing on each bead, and letting creativity flow feels grounding. It’s more than just crafting — it’s a personal moment of calm and expression.
On quiet evenings, when I finish a project and admire the final piece, I like to unwind with something light and soothing, much like creamy custard sweetness that pairs perfectly with the satisfaction of completing something by hand. It’s that small sense of accomplishment that keeps me inspired to start a new project again.
Final Thoughts
Making your own jewelry doesn’t have to be complicated. With basic tools, a bit of patience, and a touch of creativity, anyone can craft something stunning. For me, every piece I make feels like a small victory — a reflection of time, thought, and personal expression.
The best part is that there are no rigid rules. You can experiment, explore new designs, and learn as you go. Whether you make jewelry to wear, sell, or gift, each creation carries a piece of your story.
Jewelry-making reminds me that beauty often lies in simplicity and that handmade items hold a charm machines can’t replicate. The process itself is both relaxing and empowering — a perfect mix of creativity and mindfulness that makes every bead, twist, and clasp worth the effort.